



On the Manage Classes page, if there is more than one school in your district you will need to select which school you want to
focus on. Once the school is selected, if there are no classes yet, the page will look like the image below.
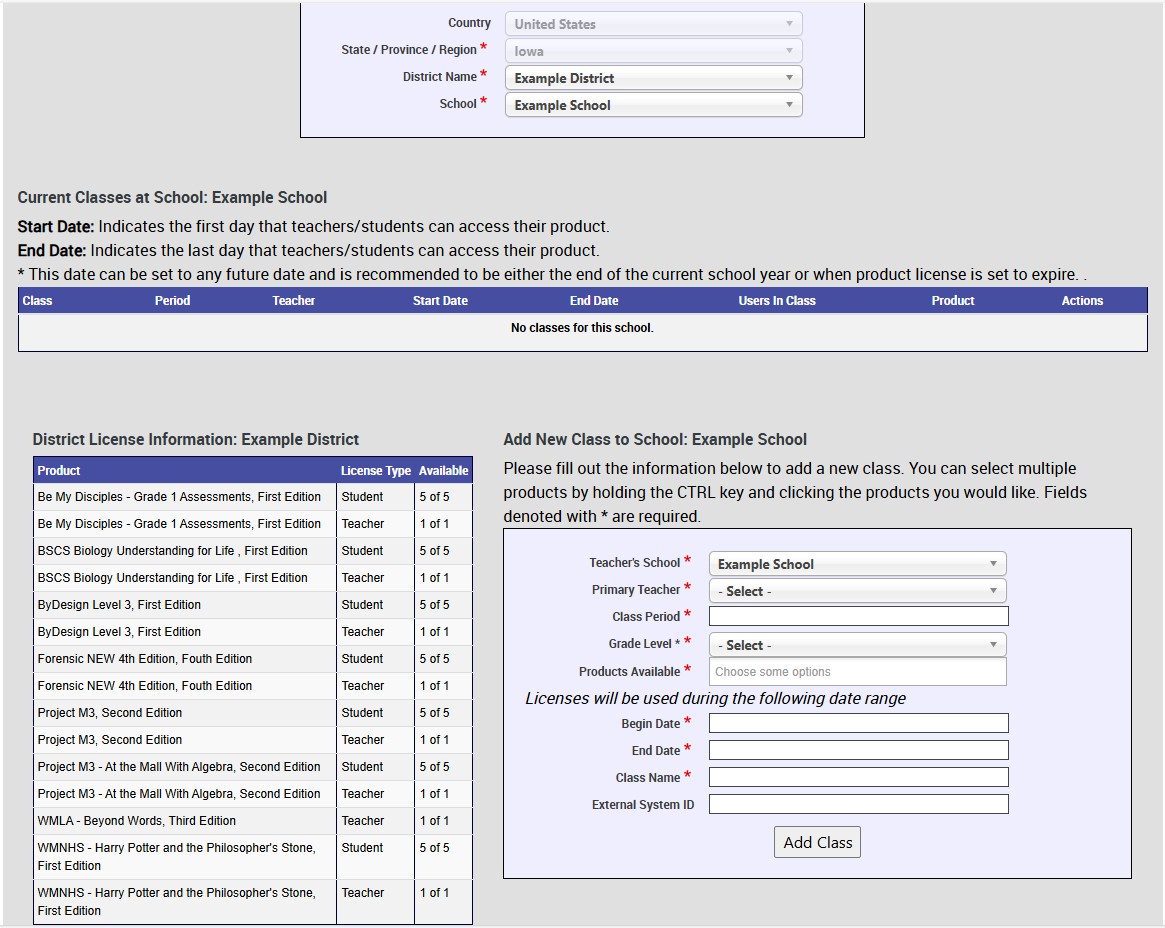
To add a new class you focus on the bottom right side of the screen. Here is you first need to select the teacher for the class you are creating.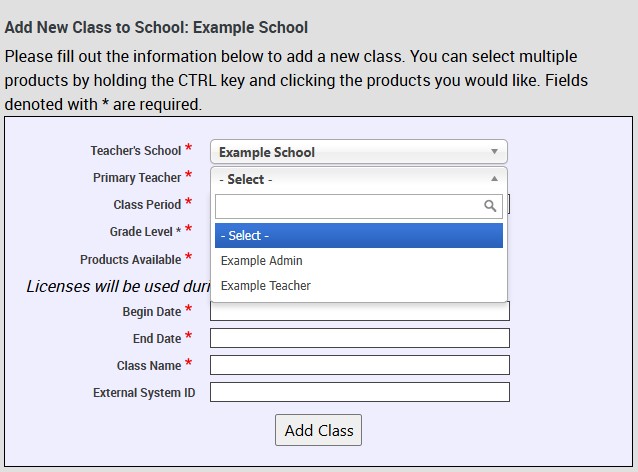
Next you will select what class period the class will be. If there is no class period then you can just use a zero or one. After that you need to select the grade level for the class. Once these two dropdowns have been filled you can click on the Products availible space. Here you will need to select each product the class will be using. If it is more then one product you can either select the products one at a time or hold down the ctrl button while clicking on the products for the class.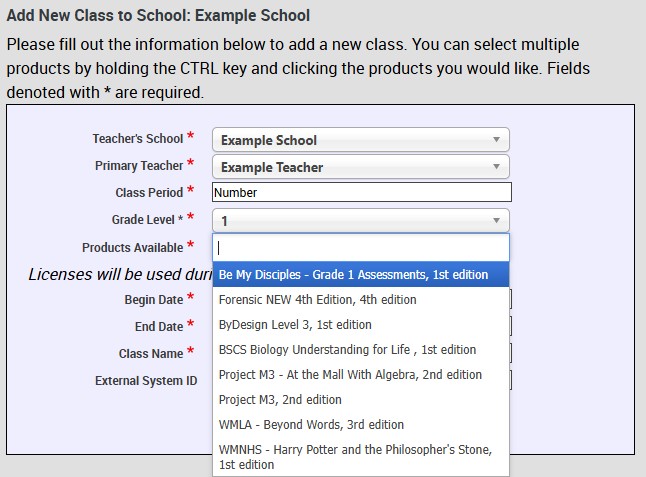
Next would be setting the start and end dates for the class. The product can not be accessed outside of these dates. Admins can set the dates to be anything from the first day of school to last day of school, from the first day they have the licenses on the District account to when those licenses expire, and everything in between. The start and end dates can be edited later on if need be. That is covered later on this page. 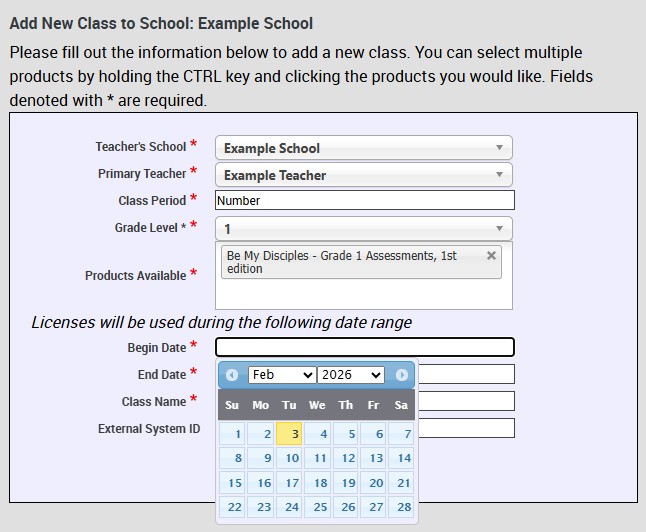
Last thing to do is name the class. It makes things easy if the teacher's name or grade is used for this. Once all the information is filled out, click Add Class.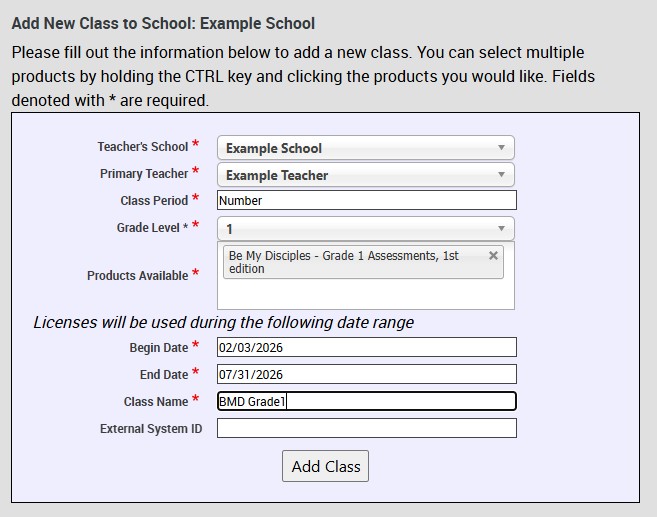
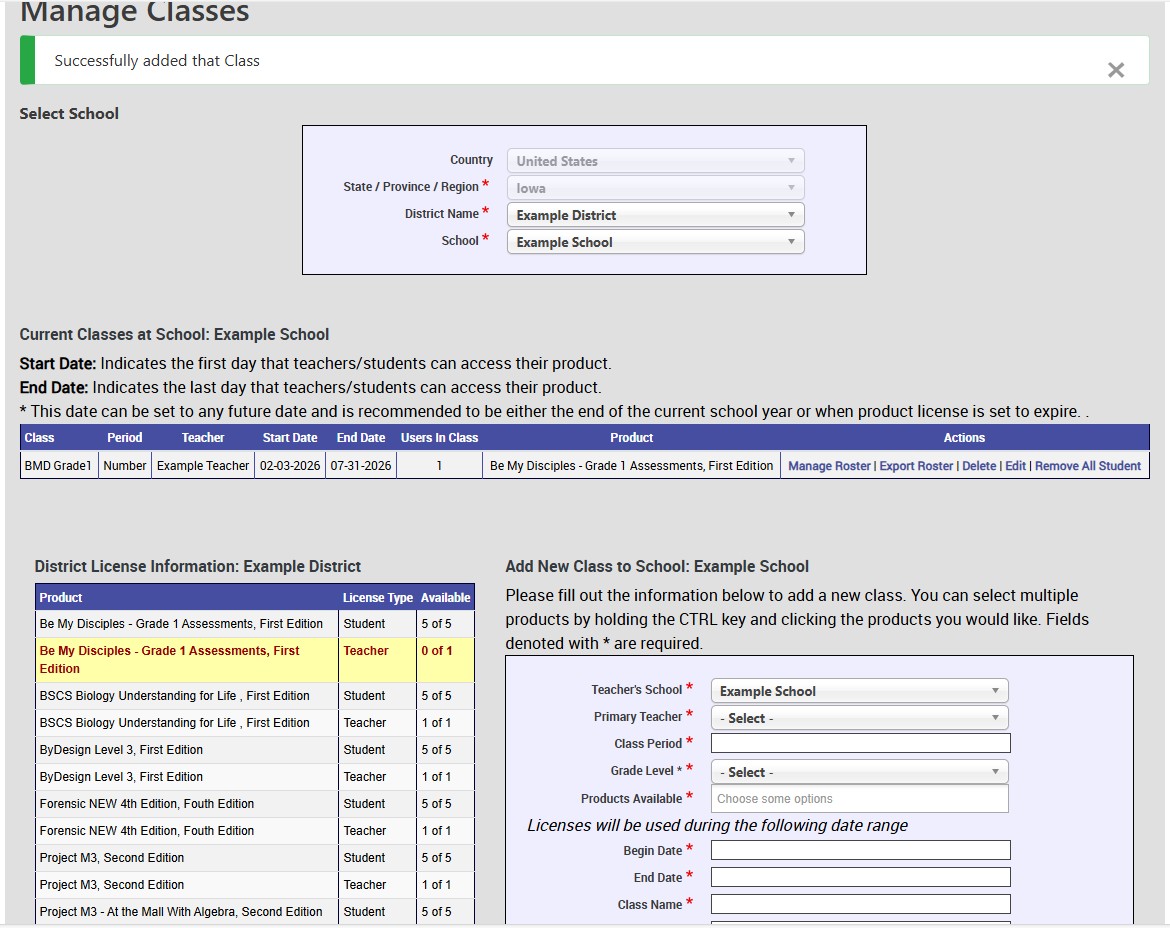
Click here to go to the Edit Classes instructions.
<< Back to Topic Selection Page
Technical Support
Live Chats are available at https://help.kendallhunt.com/k12-customer-support by clicking the "Start a Chat" button and choosing "Technical Support".
Live Chat Hours:
Monday – Friday: 8am – 10pm CST
Saturday: 9am – 9pm CST
Sunday: 9am – 10pm CST
Support Requests through email can be submitted at techsupport@kendallhunt.com.
Contact OnBoarding for help with Clever/ClassLink/Canvas setup.
To find the sales representative for your area, please click here.