


The Management Dashboard
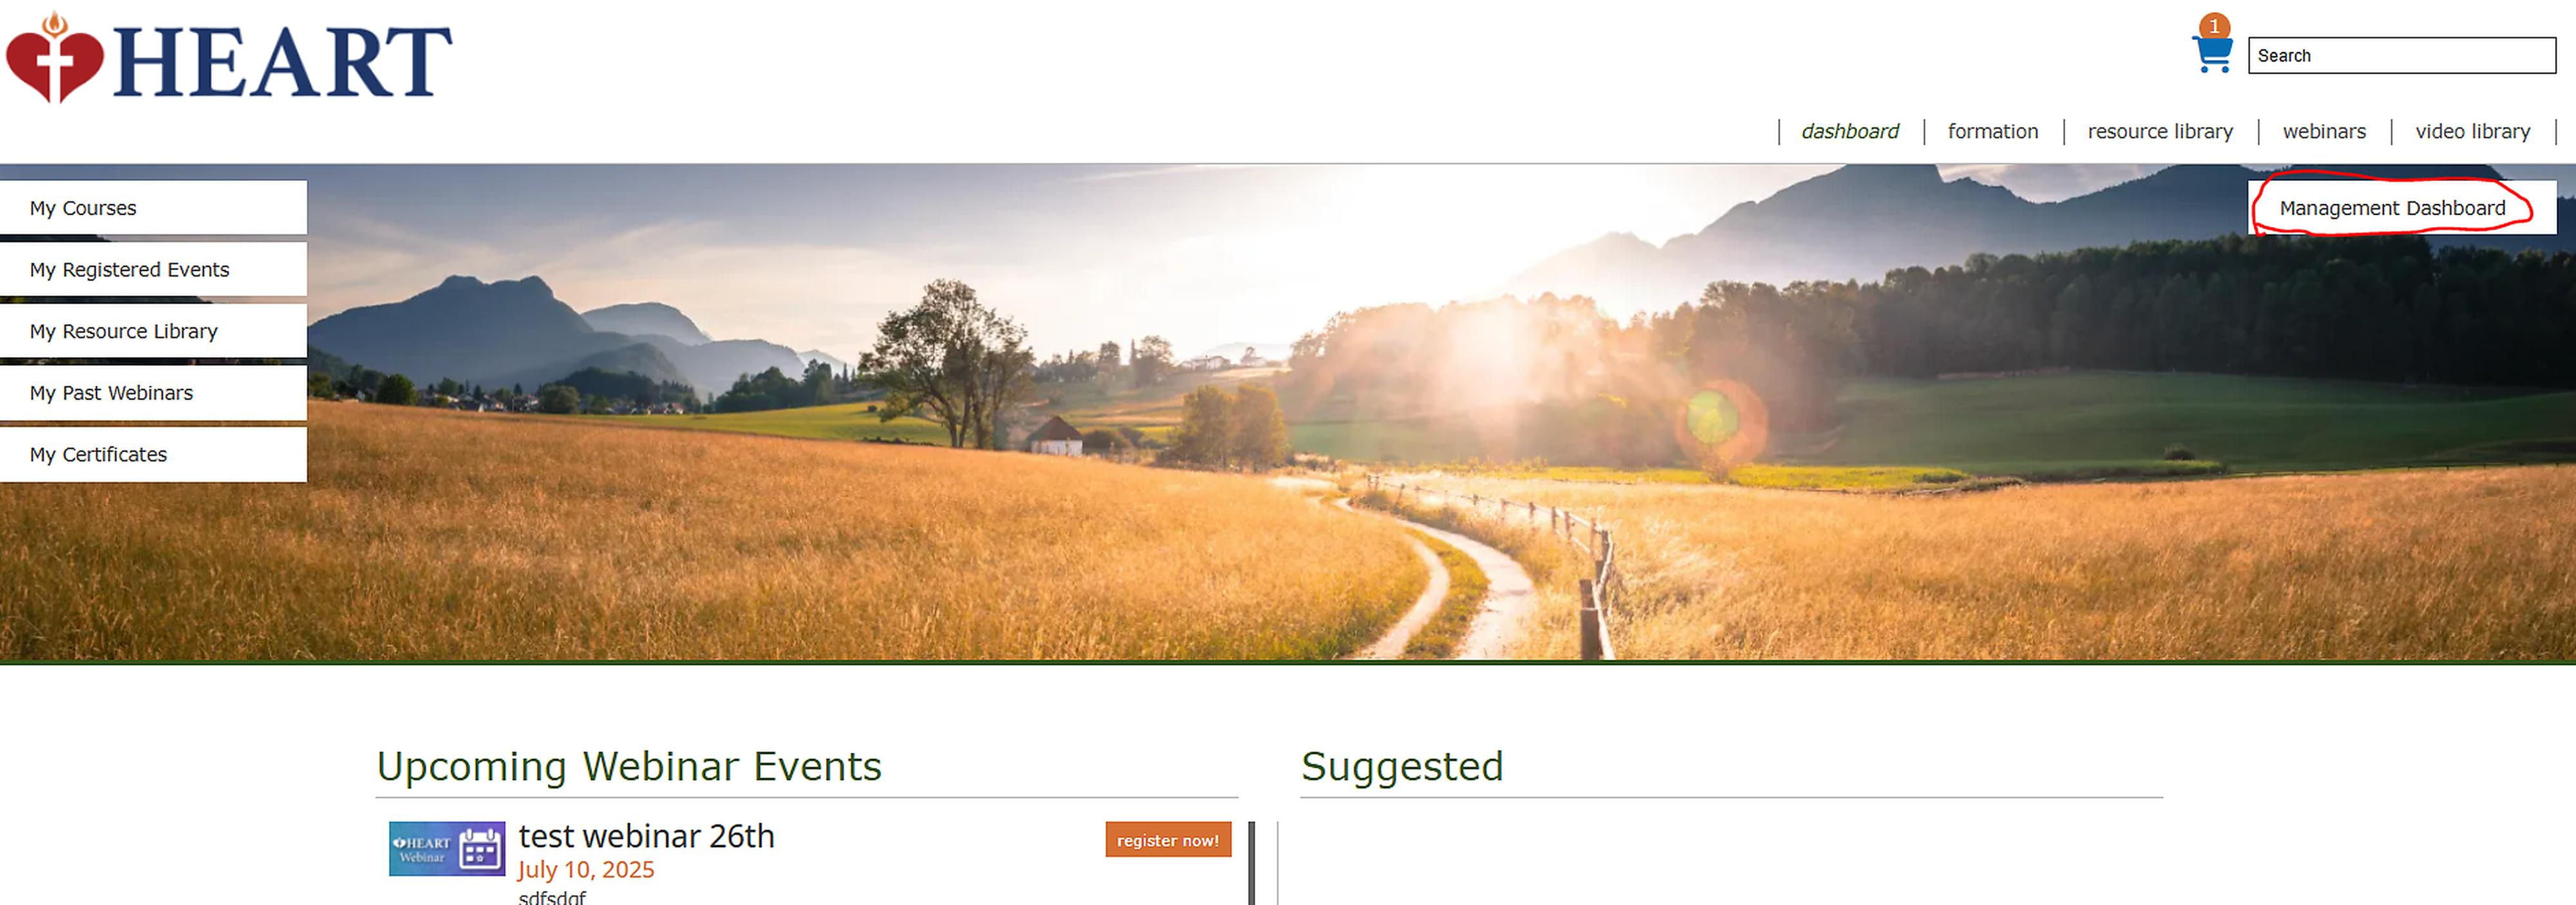
The Management Dashboard is where you can view/edit classes, setup new classes, view available licenses, and purchase/reorder licenses if need be. You can access this screen by clicking on “Management Dashboard” on the Main Dashboard screen.
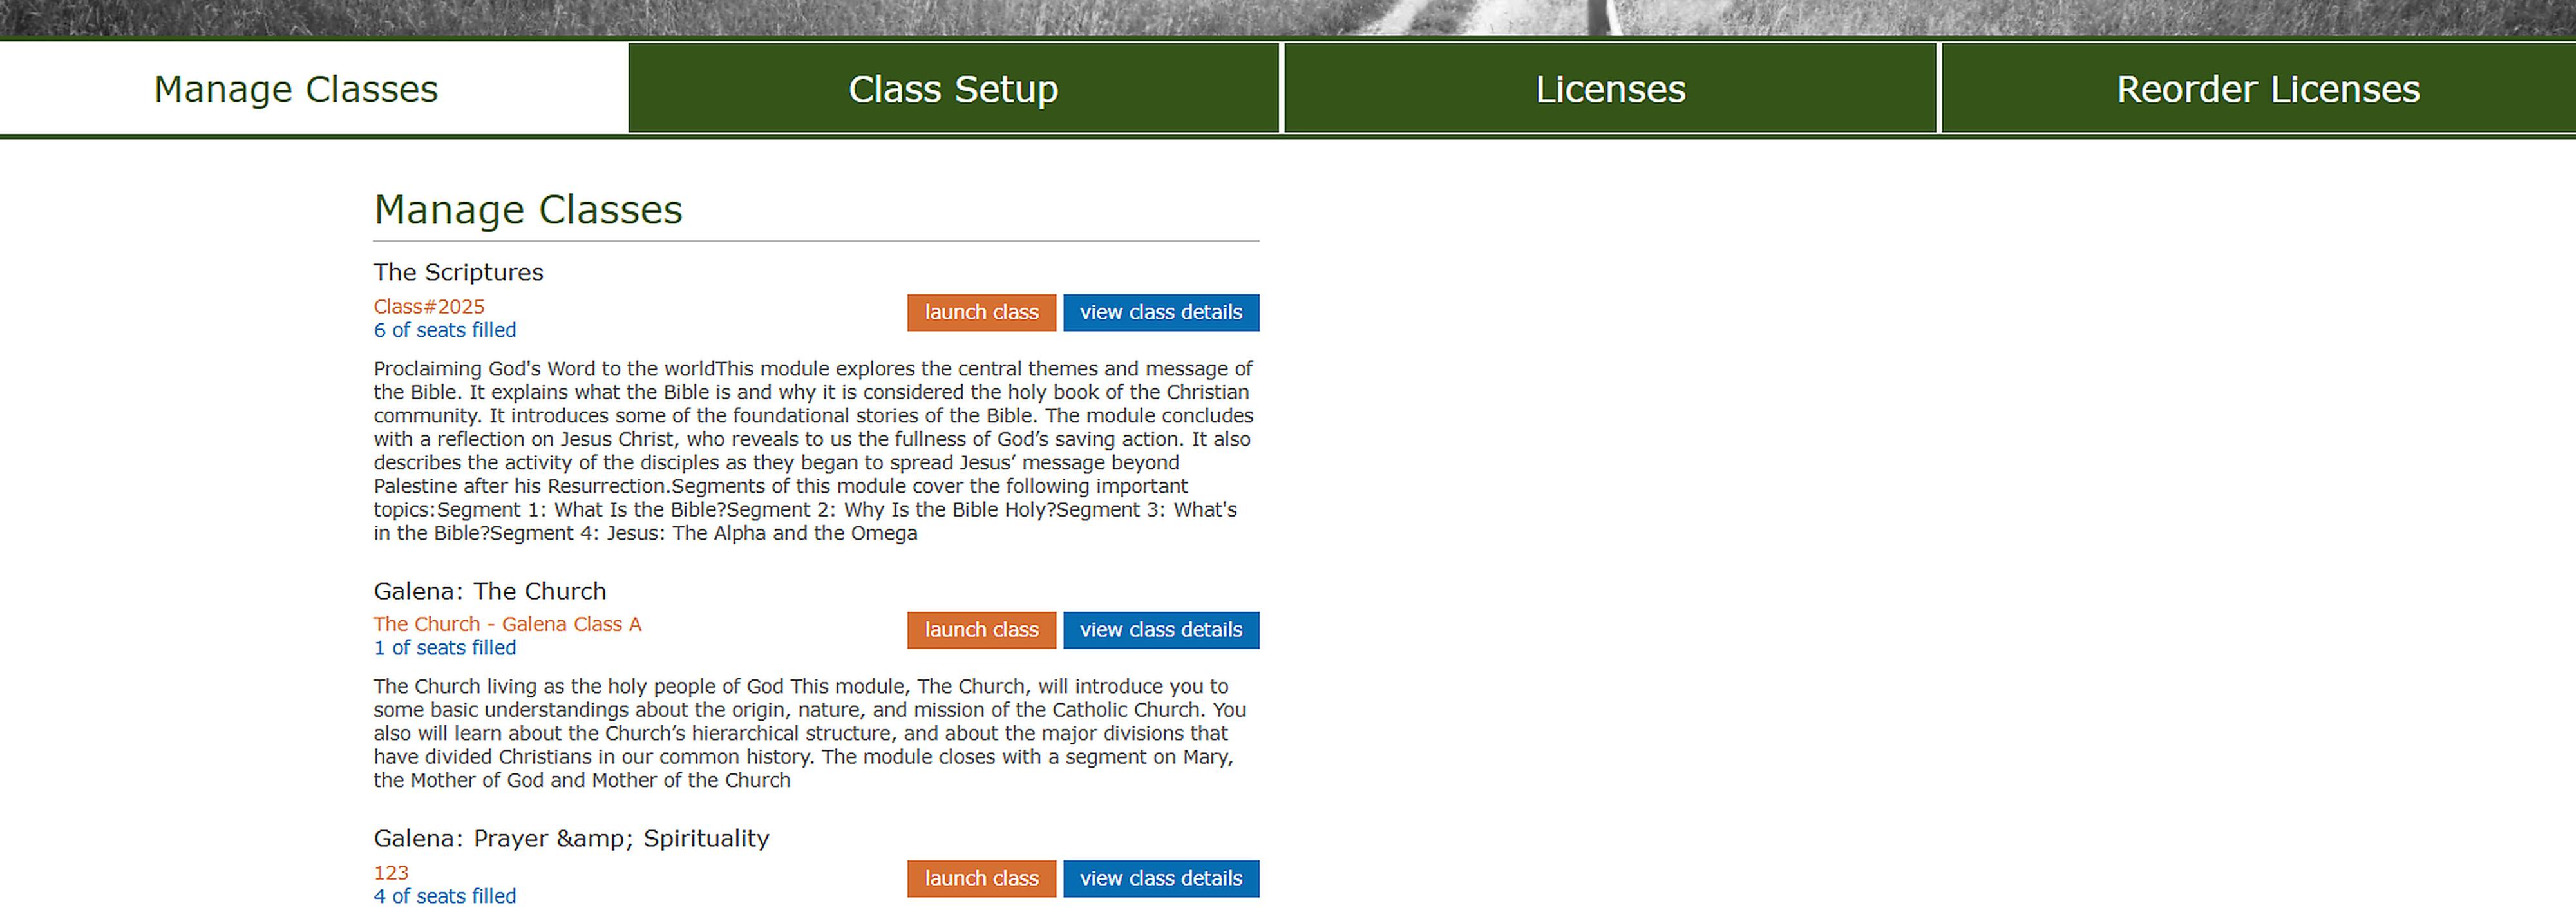
Once on the Management Dashboard, there are four tabs to choose from. The first tab is Manage Classes. Here you can add/delete Facilitators (Teachers) associated to classes that have already been set up.
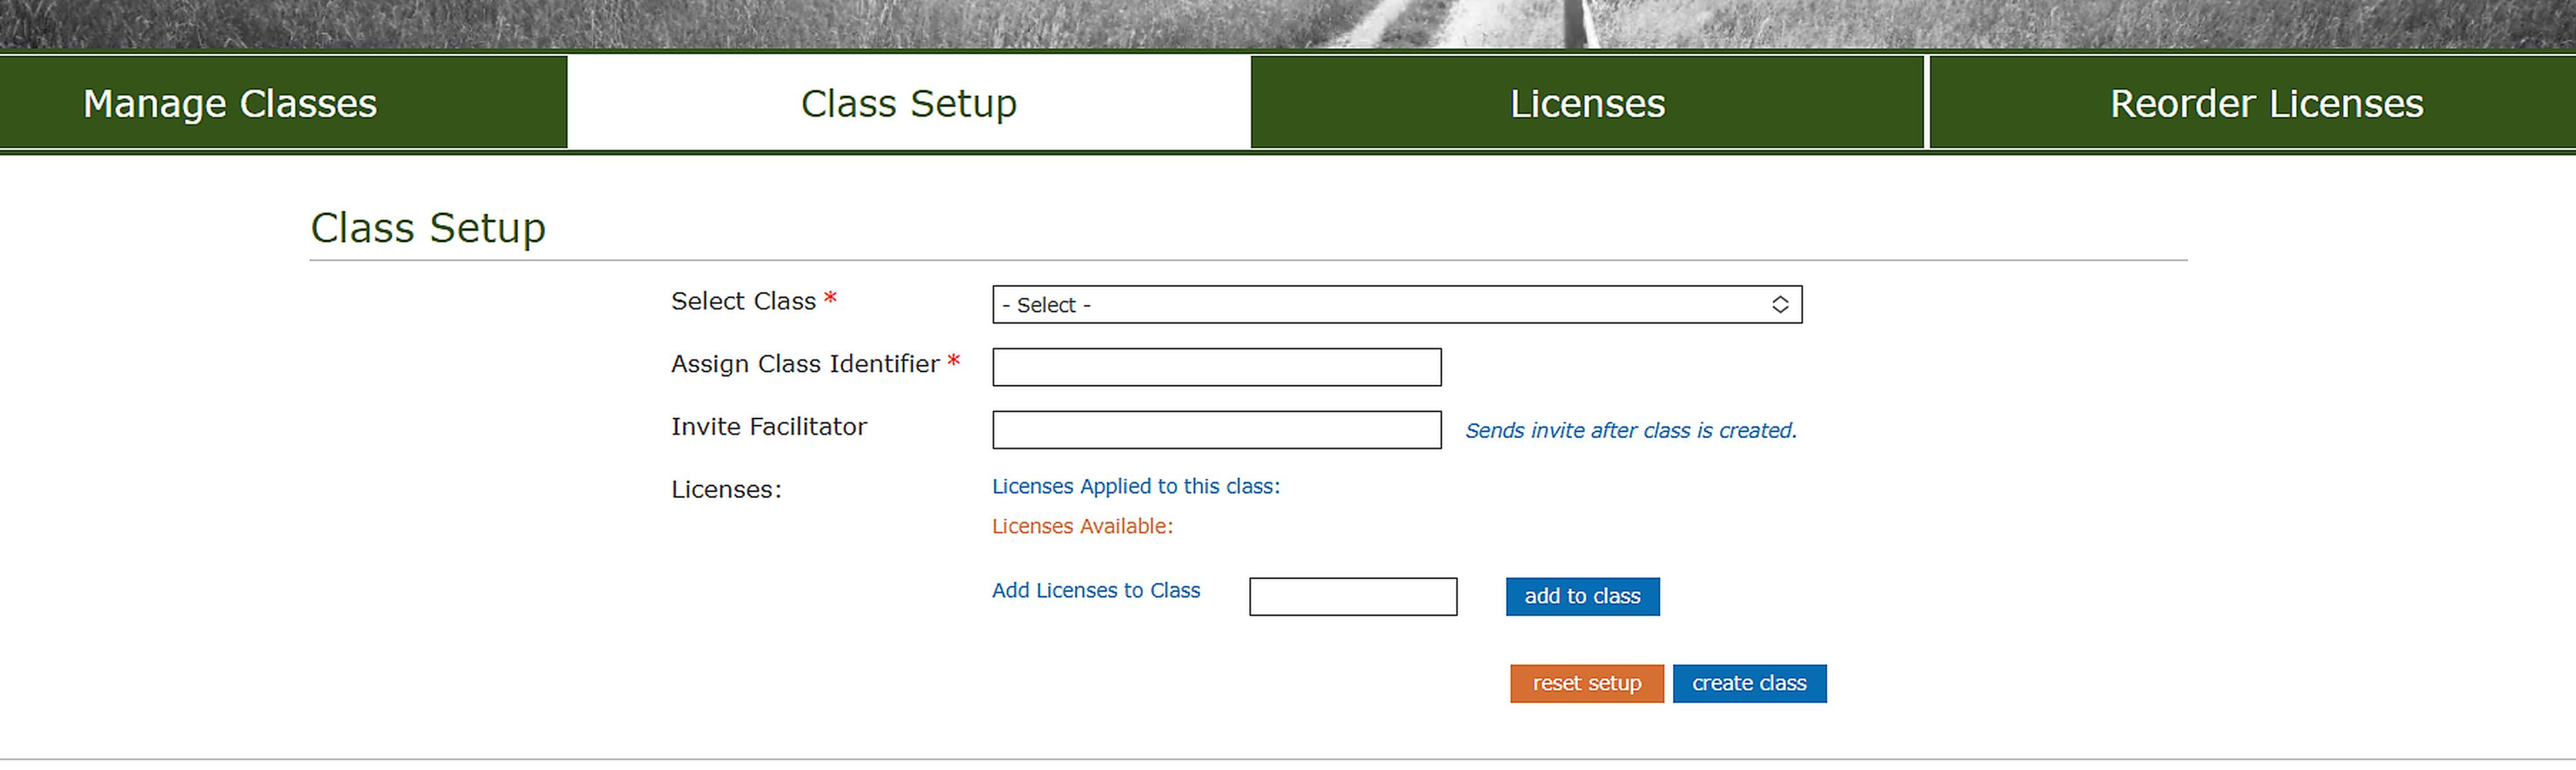
The next tab is Class Setup. Here you can create new classes and invite your initial Facilitator(Teacher).
The third tab is the licenses that the Diocese has purchased and are available. You can also see the purchasing history for the licenses.
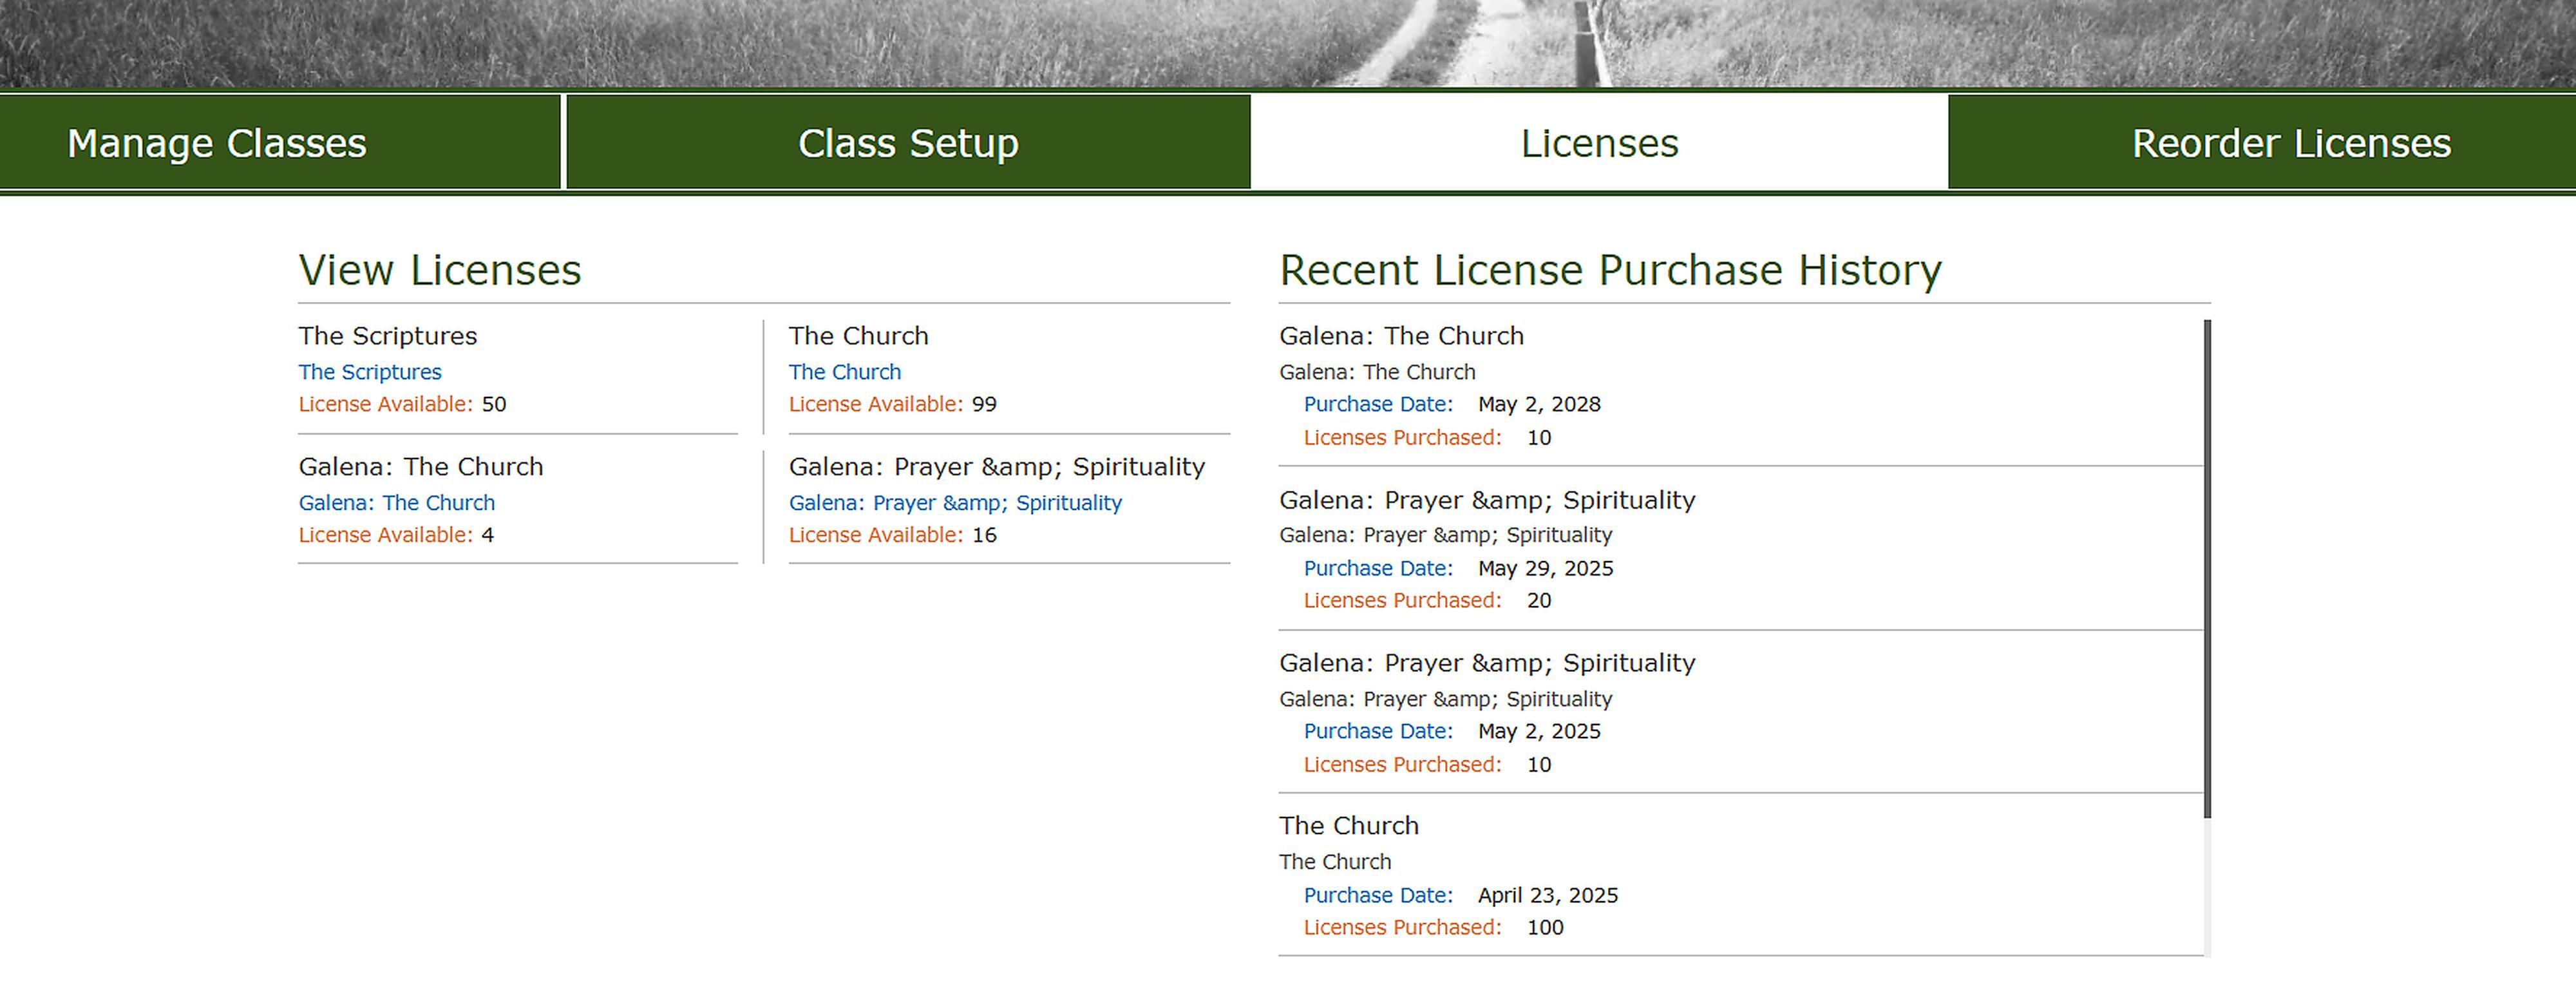
The Last tab is where you can go to repurchase/order new or more licenses.

Class Setup
To set up a class, you must first fill in the mandatory fields. These fields are marked with a red asterisk(*)
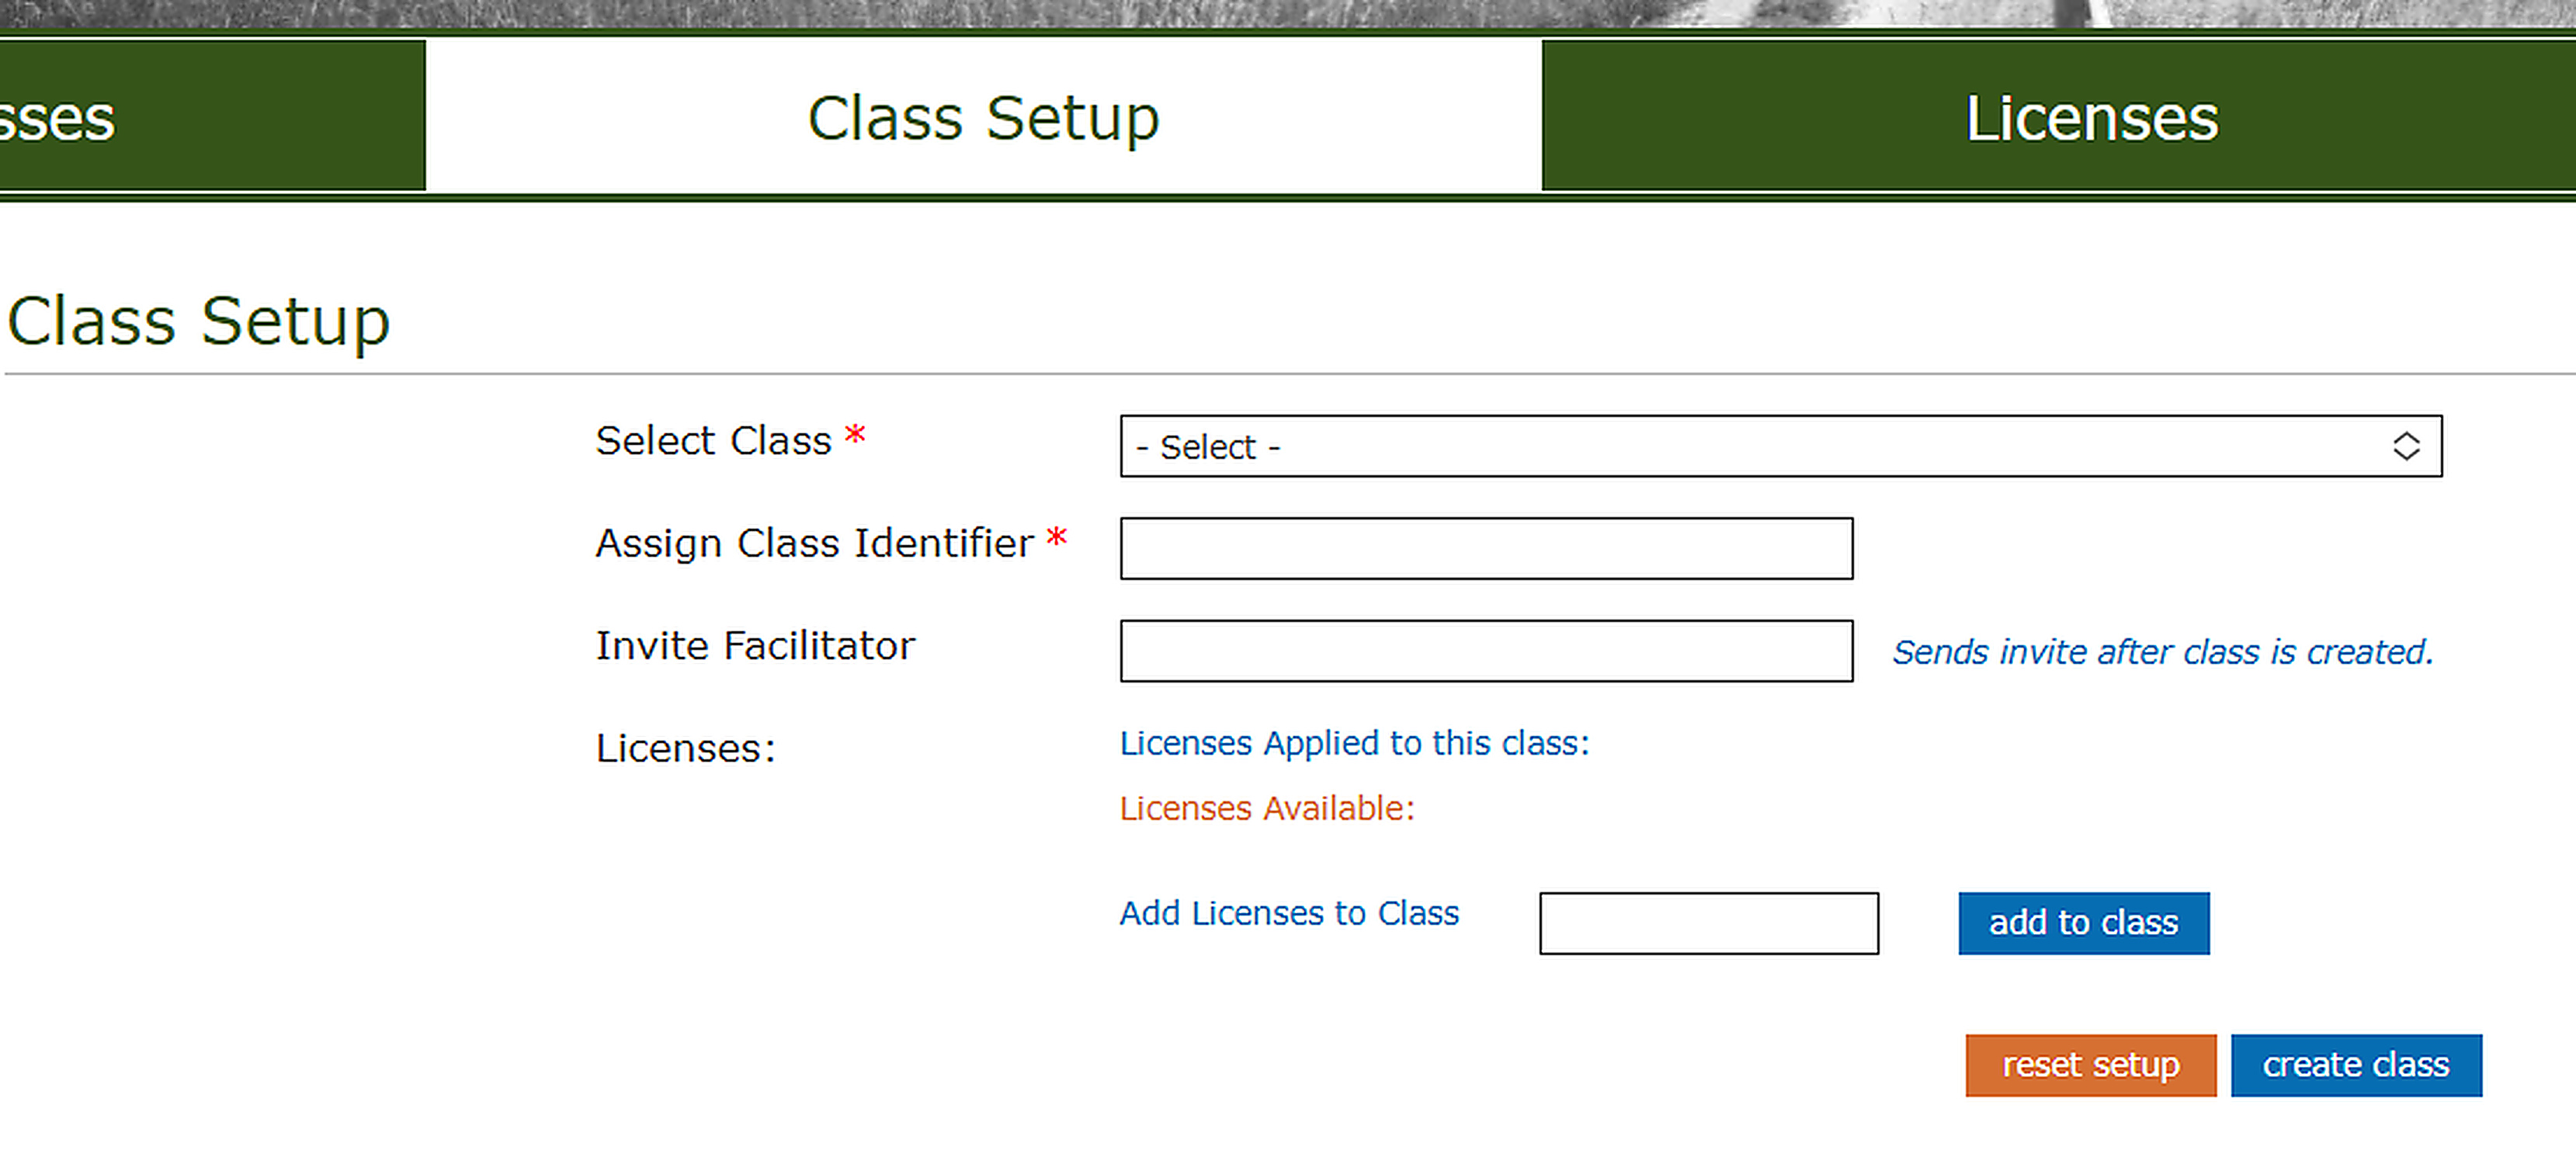
The Select Class drop down menu has a list of classes that you have licenses for.

The Assign Class Identifier field is what you would like to name the class itself.
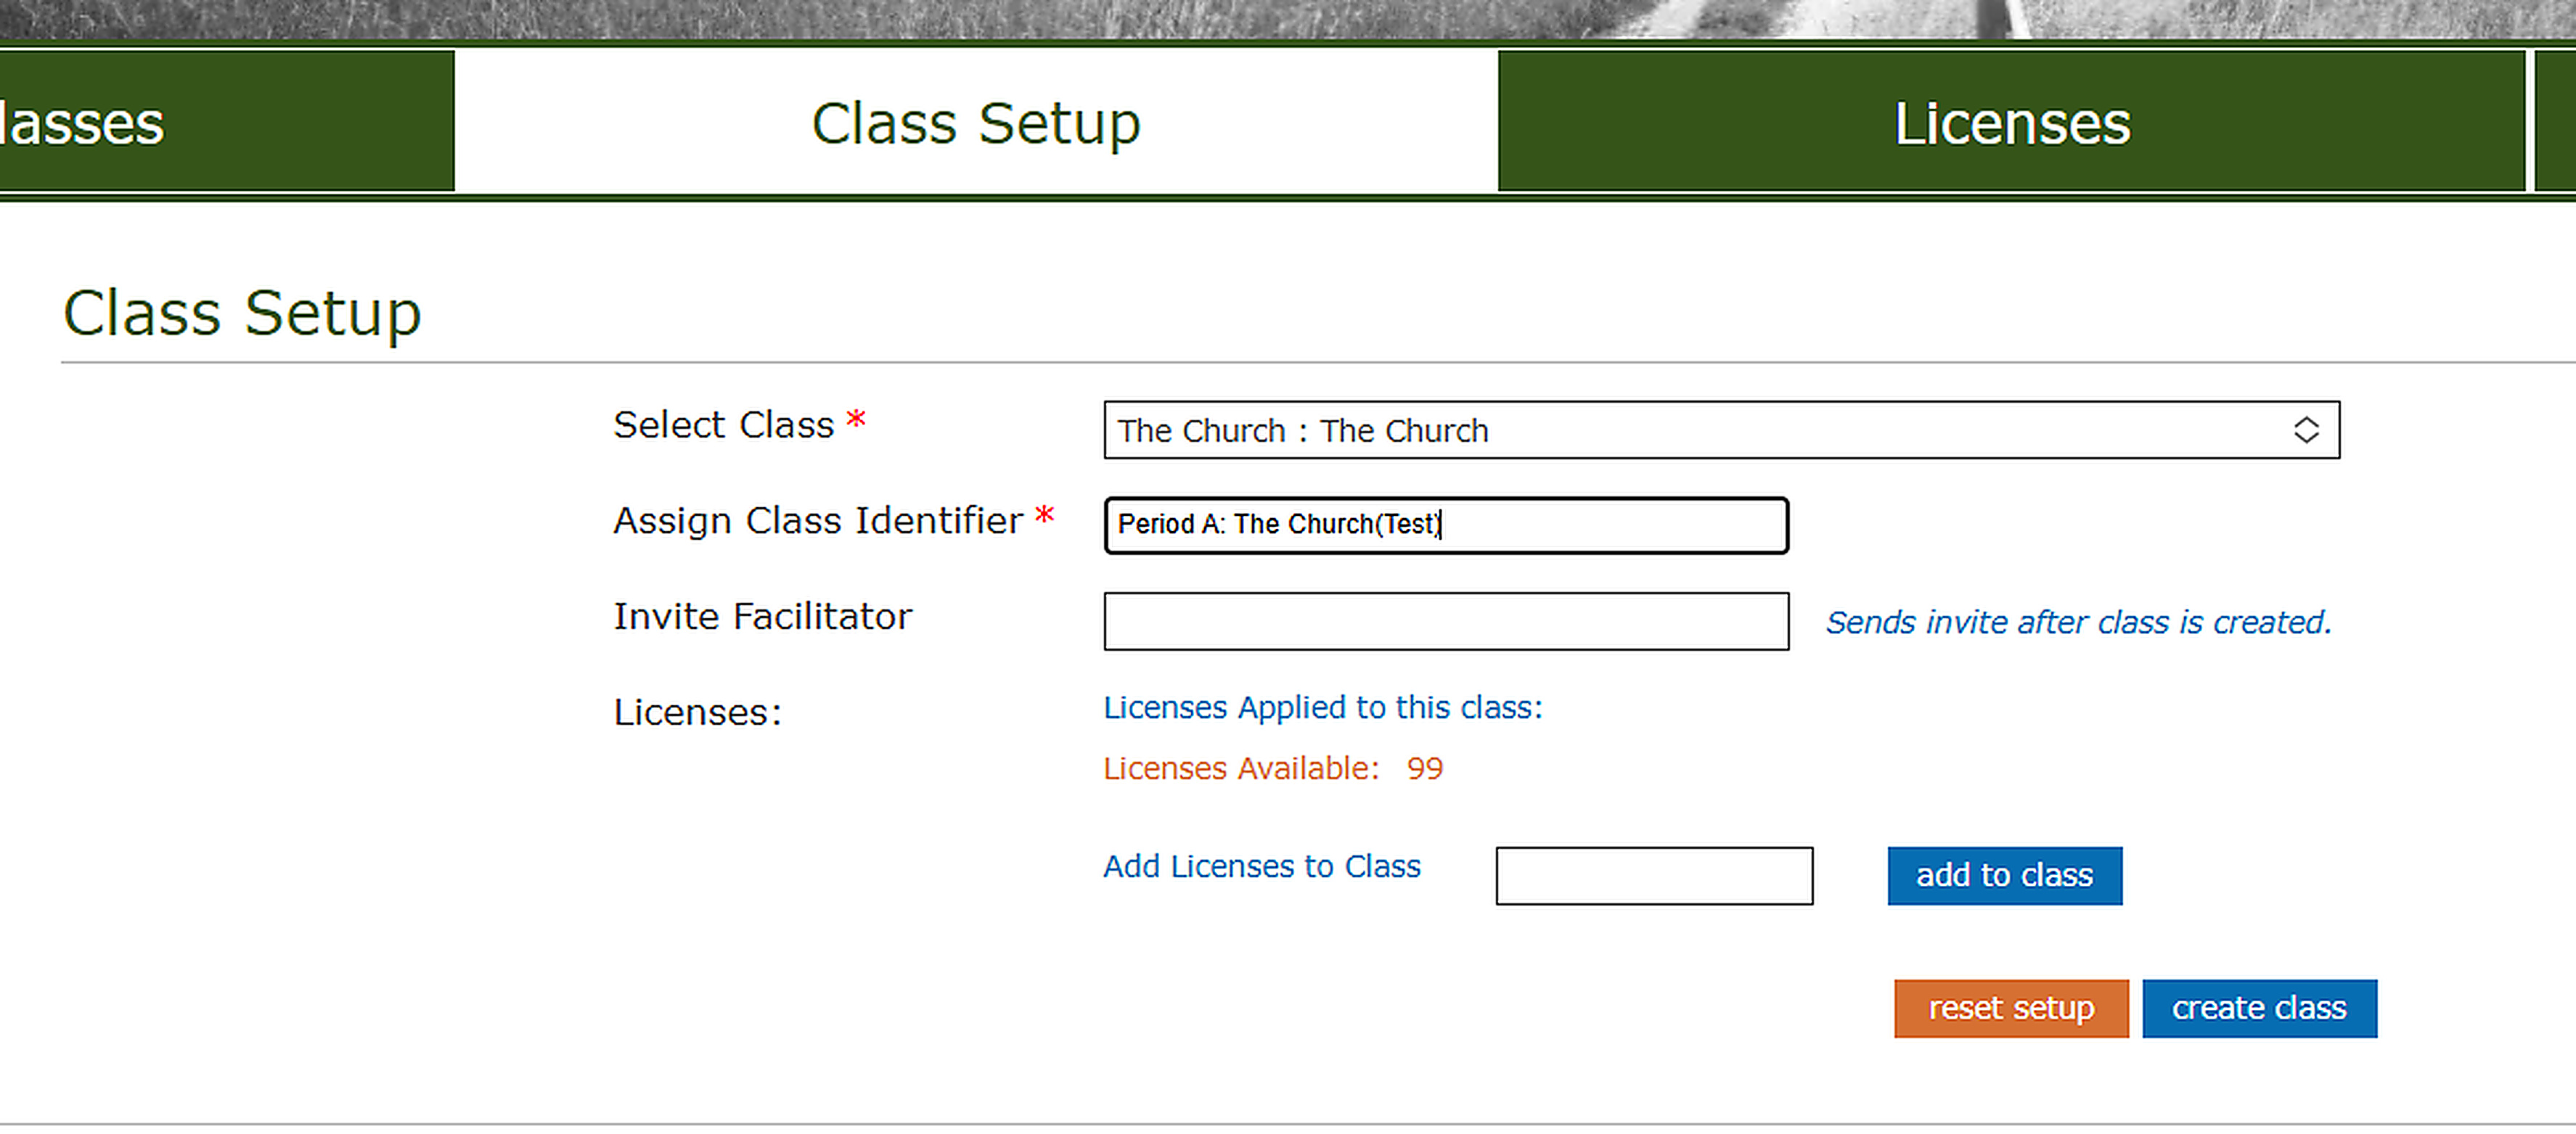
The last 2 fields are optional to enter.
If you choose to invite a Facilitator(Teacher) here, please make sure they have a HEART account and that you use the email address on their HEART account. If you are unsure who the Facilitator(Teacher) will be you can leave this option blank to be filled out later in the Manage Classes Tab.

You can also add the number of licenses to the class at this point. If you are unsure of the number of Learners(Students) that will be attending the class, you can leave the field blank and add the licenses later in the Manage Classes tab. If you do add the licenses here, please make sure to lick on “add to class” before clicking on “create class”.

Manage Classes
Once a class has been created, you can then go to the Manage Classes tab. Here you can find the class you want to change. Once you find the class, click on “view class details” to make changes to the class. This will open “Manage Class Details.”
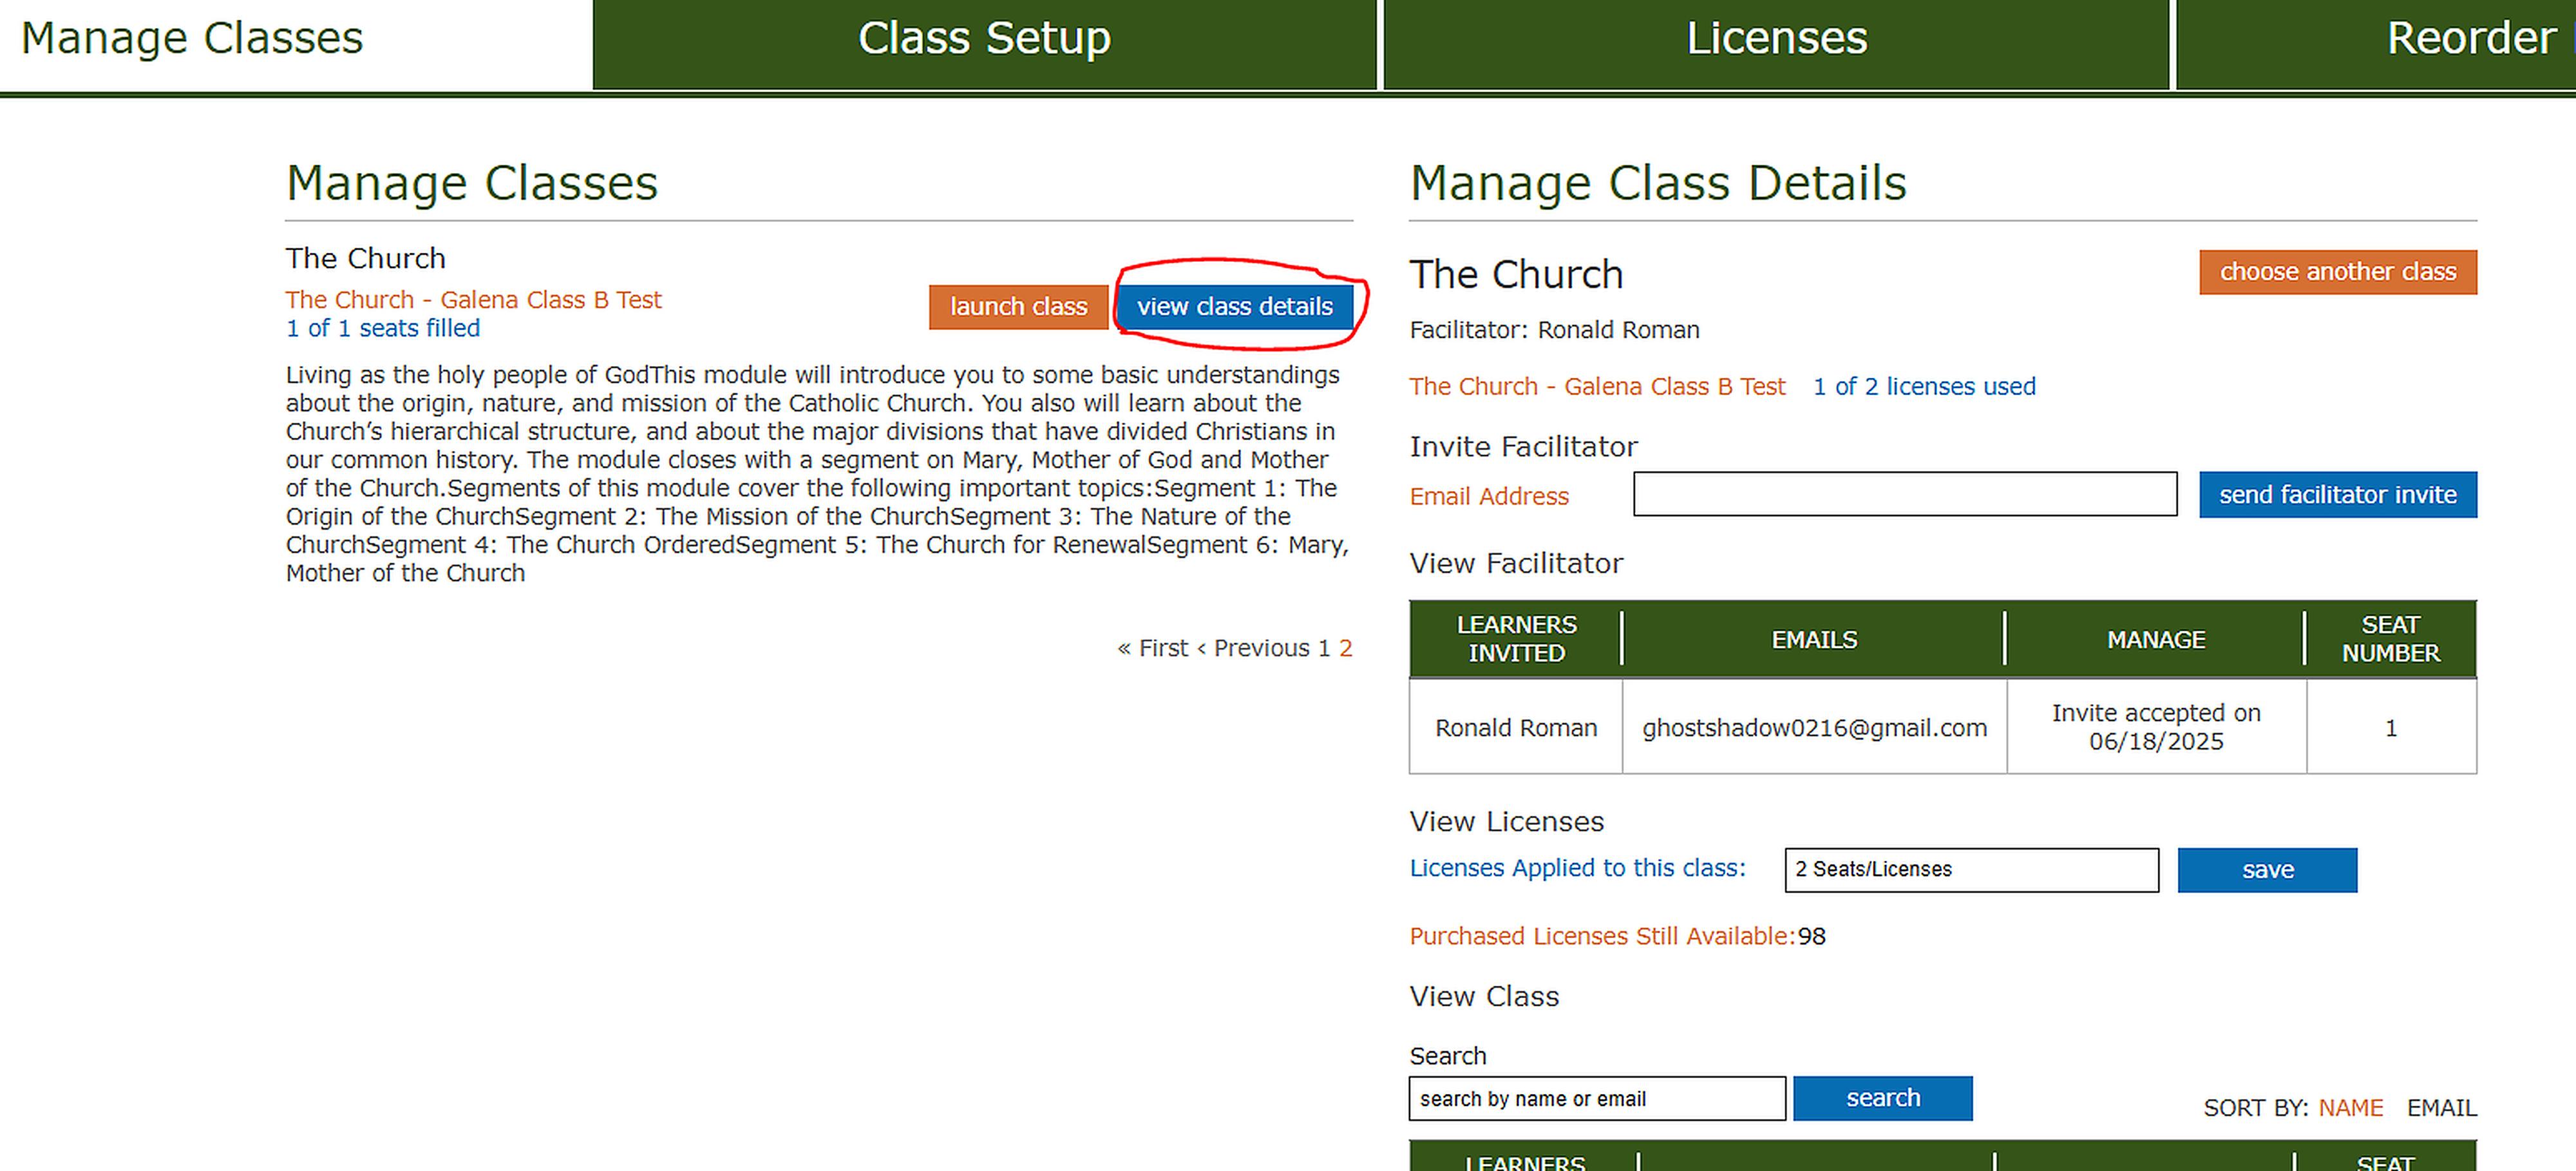
With “Manage Class Details” active, you can send out invites for Facilitators (Teachers). Classes can have more than one Facilitator. You can see who the Facilitators for the class are, when the invite was set/when the invite was accepted. You can also either cancel the invitation or resend it if the Facilitator hasn’t accepted it yet.

You can also Change the number of licenses used for the class in the Manage Class Details.

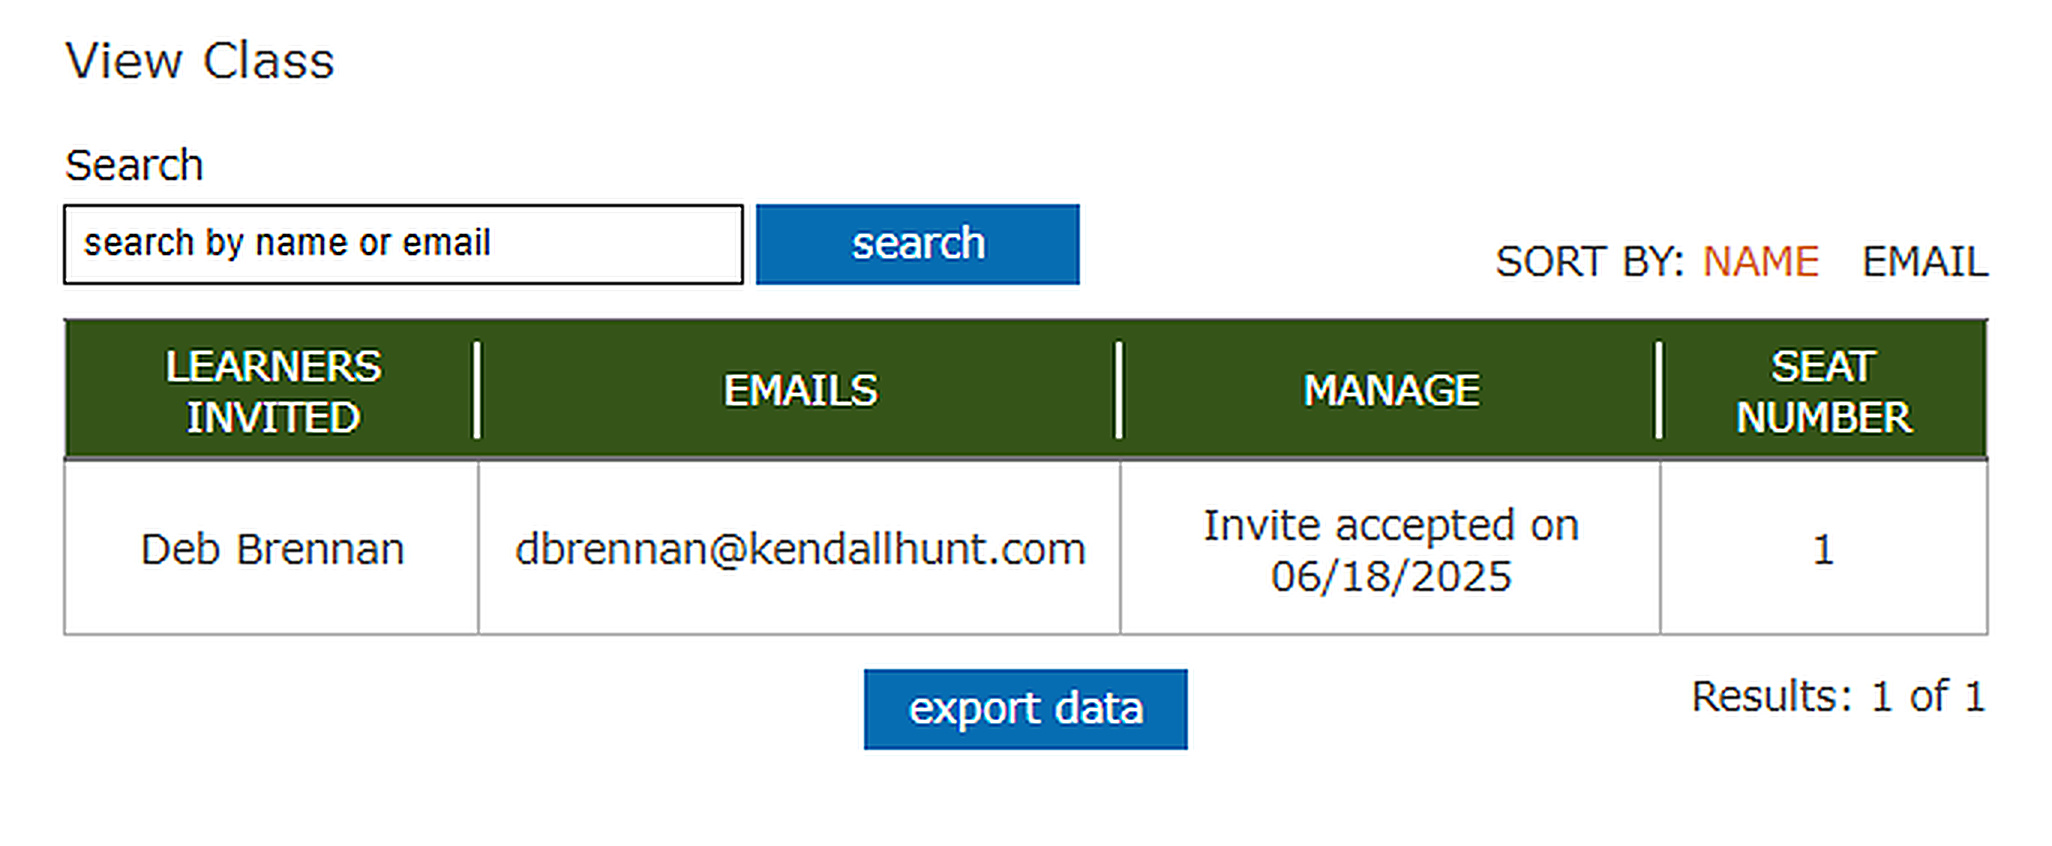
You can see the Learners (Students) in the class but are not able to send invites to Learners. There is a search bar you can use depending on how big the class is.